
This browser cannot reach USB devices
Use Chrome, Edge or Opera on a Mac or PC.
This page did not load completely
Reload it. If this stays, use a current version of Chrome, Edge or Opera on a Mac or PC.
This page works only in a tab of its own
It is shown inside another page, so it does nothing here. Open chippyos.com in a tab of its own.
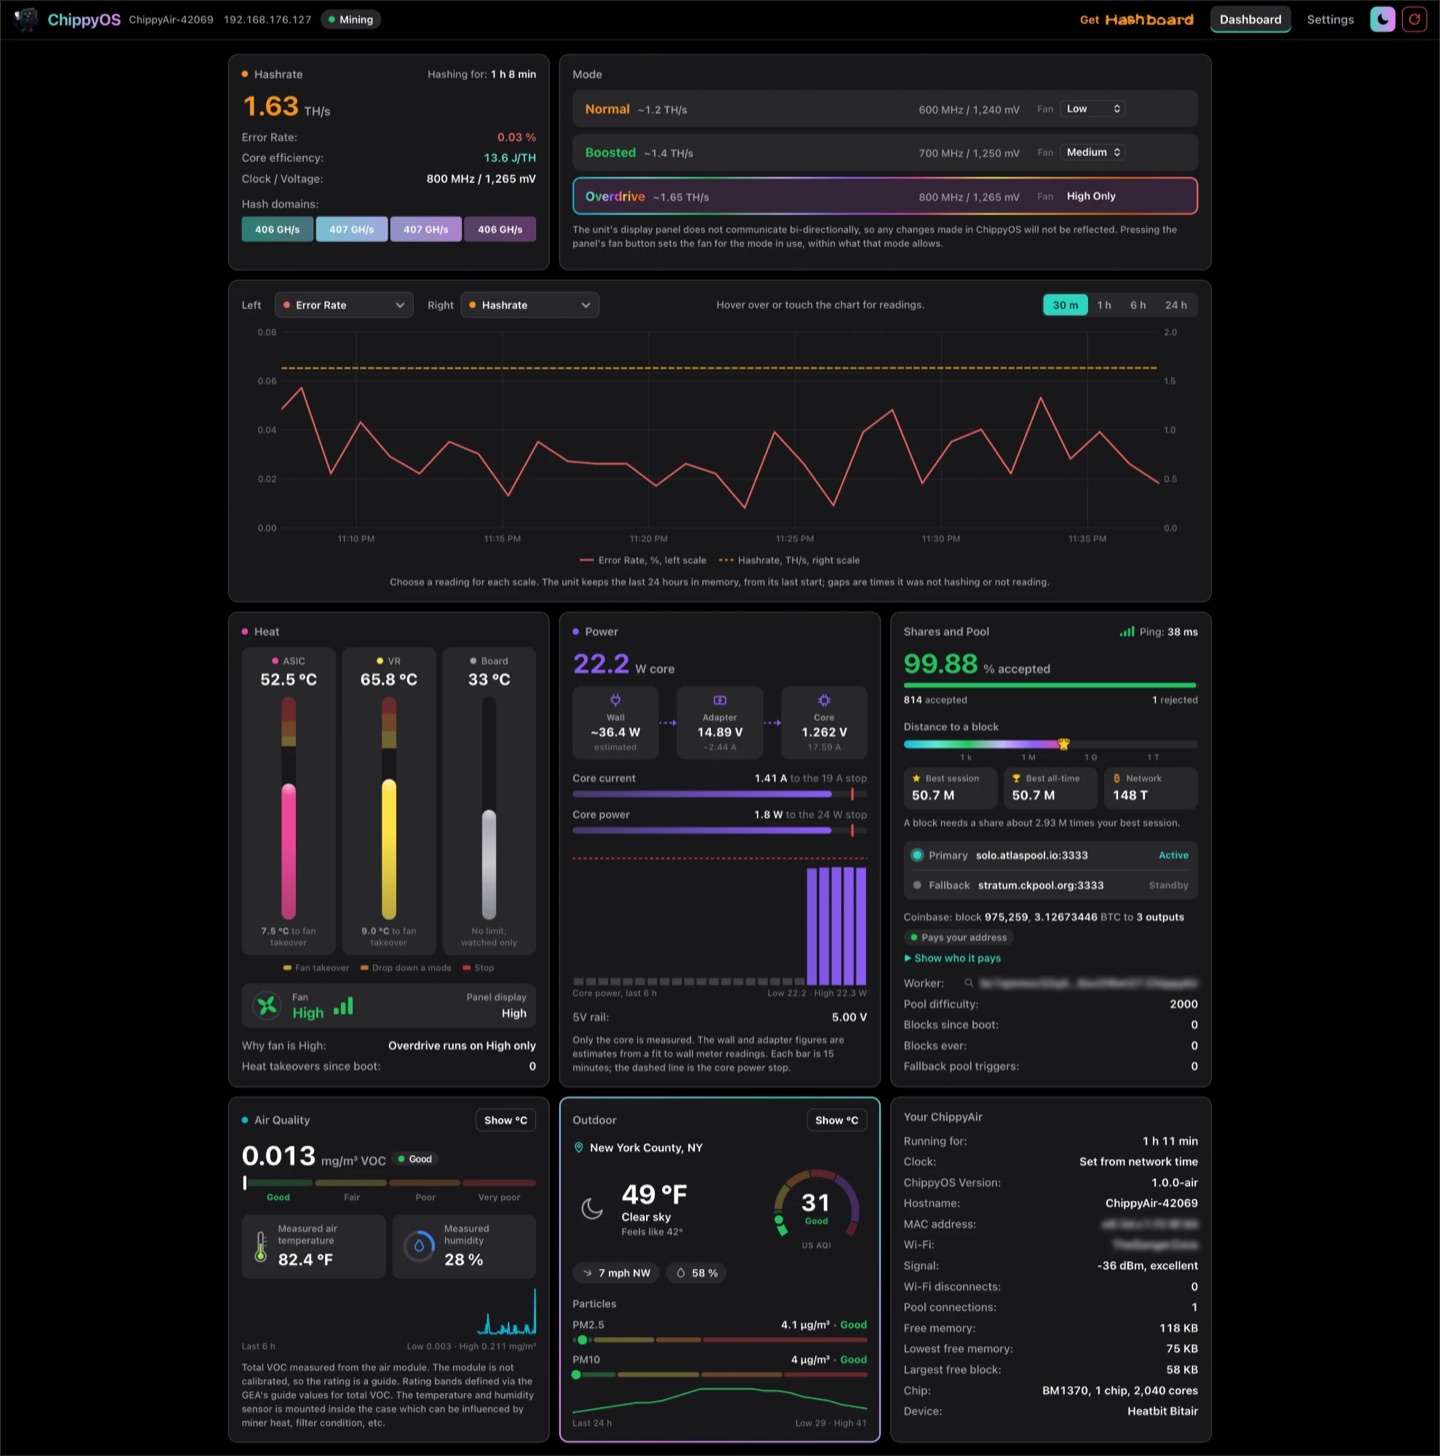
Unlock the full potential of your Bitair with ChippyOS.
- 3 mining modes with up to ~1.65 TH/s clean hash rate; over 35% more than stock with a reduction in error rate from over 4% stock to ~.2% or lower in every mode.
- Classic primary/fallback pool structure with the freedom to control your own pools alongside all the usual options such as TLS, Coinbase verification, etc.
- A beautiful, clean and efficient UI powered by the ChippyOS API, bringing the ability to monitor, control and automate your Bitair in our Hashboard mobile app. (Coming in v2.0 very soon!)
- All the same data your Bitair reported prior including indoor/outdoor air quality, plus a whole lot more.
- Firmware/versioning control is now in your hands, alongside convenient OTA updating.
- Optional password protection.
- Zero data collection, no phoning home, no phone number required, completely free.
- Factory Heatbit firmware is never overwritten, so you can always return to stock right from within ChippyOS. We don't think you'll want to, though...
Install ChippyOS on your Bitair:
Before you start:
- Use Google Chrome, Microsoft Edge or Opera on a Mac, Windows or Linux computer. Safari, Firefox and phone browsers cannot connect to the miner over USB.
- Keep the Heatbit power adapter plugged into the Bitair's outside power port, marked "15V Type C", with the unit on. Use that port for the Heatbit power adapter only.
- Open the unit, so the miner's USB-C data port can be accessed.
- Connect the miner's USB-C port to this computer with a data cable and approve any permission requests from the computer and/or browser to connect to the miner.
Nothing is written until you click Install, Restore or Return to stock twice; Return to stock appears once ChippyOS is on the unit. The Heatbit firmware your unit came with is never changed, so you can always return to stock. Keep this tab in front until a step finishes: browsers slow down tabs in the background.
1. Connect
Your browser will ask which device to connect to. Choose "USB JTAG/serial debug unit" (on a Mac it ends with cu.usbmodem and a number; on Windows, a COM port) and press Connect. If it is not listed, check that the cable carries data and is in the miner board's USB-C port, not the shell's power port.
Nerdy bits: While connected, the unit waits in its USB boot loader. The page restarts it back into its own firmware after an install, a return to stock or a restore, when Connect stops, when Connect finds an update still on trial (unless this browser first found it on trial 15 minutes or more before: then the page keeps the unit connected, so it can be returned to stock), and otherwise after 2 minutes without a step. If this page is closed or the cable comes out while connected, power the unit off and on: unplug all cabling; wait 10 seconds; plug the Heatbit power adapter back in and power it on.
2. Your unit
Your unit has room for three firmware versions:
| Slot | Holds | What happens to it |
|---|
3. Back up first (optional)
Saves a copy of the unit's whole flash on this computer. Recommended; it may take several minutes. The copy holds your Wi-Fi and Heatbit account settings, so it never leaves this computer. Restoring it below puts back exactly what the unit has now, even after ChippyOS has updated itself.
4. Install
Release notes:

Danger zone
Return to stock
Erases ChippyOS's settings and makes the unit start Heatbit's firmware again. ChippyOS has the same button in Settings, under Danger zone.
Restore a backup
Writes a backup this page saved back onto the unit, so it is exactly as it was then. Only the parts that changed since are written.